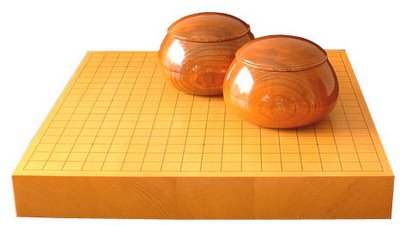
The Go set that I had
won at auction on eBay arrived late last week.
This post will cover the unpacking and stone cleaning (mostly taken with flash photography since I was pressed for time) and product detail photos (taken in natural light). You can view 1200x900 enlargments of all these photos by clicking on the images.
I later will post my overall assessments of the product and the purchase experience.
This blog entry may take longer to load since there are a lot of photos. I hope they will be useful for your own evaluations. Feel free to ask me any questions through the
comments section. I'll entertain requests for additional photos if my time (and photographic skill/tools) can accomodate.

The shipment arrived in two boxes; one for the goban and another for the stones and bowls. The goban box was oversized (a good sign) and both did not show any indications of rough handling (an even better sign).

The goban box had this label on both sides. It was good that YMI tried to drive home the message that the content (as heavy as it was) needed careful handling.

The goban was enclosed in large bubble-wrap plastic and sandwiched between sheets of styrofoam along the top, bottom and three sides. Styrofoam popcorn was used to fill the remaining empty spaces. I judged the protection to be adequate.

The stones, bowls and carry bag were packed with styrofoam popcorn. The stones were in zip-lock bags and tucked into two corners of the smaller box.

Here are the bowls (inside the bag) and the stones after I had lifted them out of the box. You'll notice that the black stones appear powdery. I've learned that all new Yunzi stones ship this way and that they need to be cleaned before use.

The jujube bowls seem to have been nicely protected inside the carrying bag. The lids were sleeved in foam netting. There were no signs of scratching or scuffing.
 Brochure: Front and Back
 Brochure: Inside
A
Yun-Zi brochure accompanied the stones. Clicking on the images will give you a (hopefully) readable enlargement (assuming that you can read Chinese).

Here you can see the grain detail of the kaya board. The board alone weighs 14 pounds and is made from one solid slab of wood. Most table boards are made from 4 sections that are glued together. I'm not sure if this is a good thing or not.
I had heard that table gobans are made from multiple pieces of wood either because (a) manufacturers need to make use of every piece they've got or (b) it reduces the risk of warping. Still, I remember being told that, as long as the wood has been properly dried, the risk of warping or shrinking is minimal to non-existent. Maybe someone can enlighten me on this.

Here you can see the pattern of the grain. Click on the image for an enlargment.
This board is not plain wood with a waxed-on coloring as I understand traditional Japanese gobans are. You can compare it to a
Hyuga Kaya table goban from Kuroki Goishi Ten that I had blogged about back in early November (bottom of that link). This goban from Yellow Mountain Imports is more like a finished piece of furniture with a satin sheen. The playing surface is smooth and almost glass-like. More on this later.
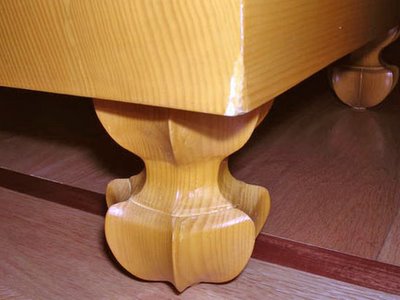
I thought the board nicely complemented our furniture. I placed nine thick felt pads on the bottom for protection.

The bowls and board were set aside so that I could get started on washing and oiling the stones.

The stones were all covered with powder so I needed to wash them in the kitchen sink. After closing the drain, I placed a large towel in the sink and set the stones on it. I added a generous amount of dishwashing detergent and submereged the stones in water and suds. Using my hands and the corners of the towel, I scrubbed them clean.
I used six 1x1 foot kitchen towels for the whole process. One in the sink, two for drying, two to set the stones upon to dry, and one for wiping off excess oil.

I used a strainer to collect small batches of stones from the sudsy water and rinse them under the tap. These then went onto a drying towel.

The black stones were laid out to dry further. I then repeated the process for the white stones. Both batches are now ready for oiling.

My oiling mix was 6 drops of light canola oil and 6 drops of an aromatherapy oil from
The Body Shop. This mix is just an aesthetic preference of my own. I selected a scent called Pink Grapefruit which is somewhat flowery and citrusy. The scent is both pleasant and waking at the same time.
You can opt to instead use sewing machine oil as is sometimes recommended for slate stones.
I placed the mix and the black stones in a zip-lock bag. The stones were then gently rolled about in the bag until I could see that they were all coated in the oils.

Now begins the tedium of wiping the excess oils off the stones. It's a slow process and I could only do six stones at a time. You have to admit however that these look much nicer after being washed and oiled.

All in all, I had 183 black stones. Here they all are: washed, oiled, counted and ready. (
Whew!)

Of course, I need to do the white stones too (
Groan!). I didn't add any more oil to the bag as there was still a lot left-over. I just tossed the white stones in. There was no residue from the black stones.
With the black stones, it was easy to see excess oil. Not so with the white stones. Wanting to do a thorough job, I slowed down my wiping process to two stones at a time.

Finally, both sets of stones were finished. There were five broken white stones in the batch that was sent to me and I contacted YMI at
welisten@ymimports.com. They responded later in the evening that they would mail me replacements.
The auction stated that these stones were 10mm thick. I measured a sample of ten stones with a caliper and, they are, in fact, only 9.5mm thick making them equivalent to Size 34. Still, I noticed that they were thicker than the biconvex stone samples that I got from the
Go-Gamestore which were 8.8-9mm thick.
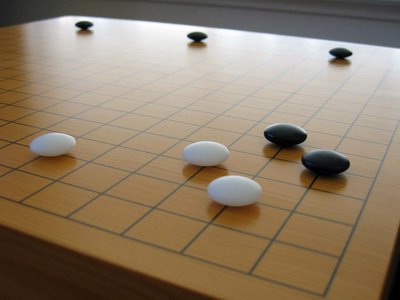
This by-the-window shot helps show the satin-like surface of the goban. I'm not an expert on wood finishing but it looks like the kaya was painted with one layer of a transparent shade and finished with a second clear layer. The clear layer was probably then buffed to its satin finish.

This close-up hopefully will provide you with more detail of the board's surface. The top surface feels completely smooth to the hand. You can only feel the grain on the sides. The bottom is glossy which is why I think they used a second clear layer on the board.

I'm guessing that the lines were silk-screened onto the board's surface. This enlargement shows minor imperfections that I found to one line on the goban. Notice how there seem to be notches on the second line from the top?
The angle and lighting of this shot makes the board look paler and less saturated than it really is.

And now for a close-up of the Yunzi stones. You'll notice some slight imperfections to the black stone to the left but these are nothing that you would notice unless you used a magnifying glass. Yunzi stones are supposedly molded from a mix of amber and ground stone. About a handful had visible imperfections; a pock here or there, perhaps a tiny chip, or a less-than-perfect curve.
The board color in this picture is very much what it looks like in real life; a warm orange-tan.

Here's another close-up of the stones. The black Yunzi stones look like slate and the white ones remind me of
Mentos. Keep small children away from them. I had a hankering for candy last night while I was studying with these.

Here's one last close-up so you can enlarge it and see the texture of the black stones.

This is the set photgraphed indoors when illuminated by diffused sunlight. The colors seem just a little more saturated but it's roughly accurate.

This is a photo of the set outdoors under direct sunlight. The intensity and contrast of these lighting conditions really overemphasize the warm colors of this set.


